|
At times, you may
want to make your own custom maps
highlighting locations such as rail
stations, hotels, restaurants and other
areas sites. There are many
different graphic programs available
allowing you to take screen shots, alter
them and then save the changes to an
image on your computer. Once
saved, the image can then be uploaded to
a trip activity.hen be uploaded to
a trip activity.hen be uploaded to
a trip activity.
Here we go through
the basic steps when using a Windows PC
that will allow you to capture an image
on your screen, alter it, save it to
file then upload it to an activity.
On the booking page for each activity,
select
 to upload images to the selected
activity.
to upload images to the selected
activity.
During your travels, use
your mobile device to view your uploaded photos.
Select
 to upload your own photos to an
activity. Once a photo has been
uploaded, it will immediately become
available for viewing by anyone tracking
or sharing your mobile and public trip
views as long as 'photo viewing' has
been enabled.
to upload your own photos to an
activity. Once a photo has been
uploaded, it will immediately become
available for viewing by anyone tracking
or sharing your mobile and public trip
views as long as 'photo viewing' has
been enabled.
 You may enter
the Google Map web address directly into
a trip activity on the Booking
Page at the
You may enter
the Google Map web address directly into
a trip activity on the Booking
Page at the  location
allowing you to use your
phones GPS Navigation with single
click access from your
Mobile Trip Profile to guide you
directly to your destination. location
allowing you to use your
phones GPS Navigation with single
click access from your
Mobile Trip Profile to guide you
directly to your destination.
On the Activity Photos
Booking Page, select the option
'Print Preview - Large Format' so
that maps are printed in the larger
version making them easier to read.
From your m easier to read.
From your m easier to read.
From your Trip Summary page,
select 'Print Preview' and then
'Print' your trip to bring along with you as
a hard-copy backup.
Steps to
Create Your Custom Map
|
(1)
Find Your Map |
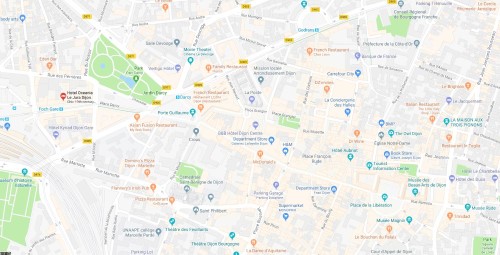 |
Use a
mapping website such as
Google Maps to find your
location.
Zoom in
to the desired level of
detail.
Depending on your goal, show
familiar landmarks such as
the rail station where you
will arrive or your hotel,
giving you a frame of
reference.
Hit
your keyboard Print
Screen 'Print Scr'
button to copy what is
currently displayed on your screen. |
|
|
|
(2)
Copy and Paste the Screen
Map Image |
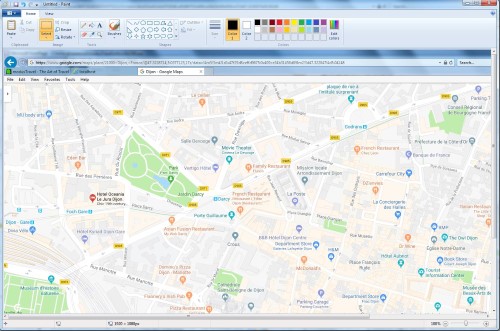 |
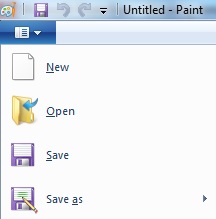
If you
are running Windows, on the task bar
type in 'mspaint' and hit enter to start
the
Microsoft's Paint
program. If you have your own
graphics program, start it as the
process should be similar.
After
the program starts, 'Paste'
your screenshot into the
application.
|
|
|
|
(3)
Adjust the Image |
 |
Click
the 'Select' button then draw a rectangle over the
area of the map you want to
cutout and
save.
Select
'Crop' to cutout the
rectangle area or select
'Cut' then 'Paste' to paste the
cutout area back into the
application. |
|
|
|
(4) Highlight Map Locations |
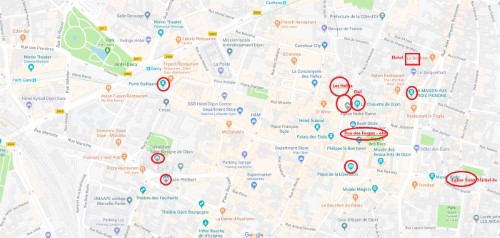 |
Using
the application menu, select a
shape and color then draw on
the map to highlight the
locations you plan to visit.
You can use different colors
and shapes to highlight
sites such as hotels,
museums, castles, etc.
Select
the 'A' Text Icon
then click on the area of
the map you would like to
add additional text. |
|
|
|
(5)
Save the Map Image |
 |
Once
your map is complete, save
it to your computer. |
|
|
|
(6)
Upload & Customize the Map
Options |
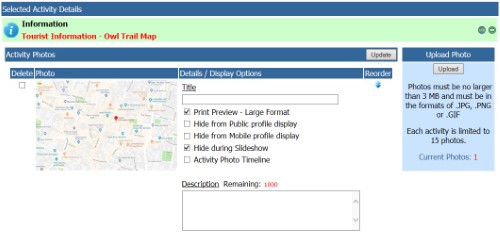 |
Upload
the map image to the
selected trip activity.
Customize how the map will
display when printed, on
Public and Mobile profile
views and on the Slideshow
presentation.
You may find it useful to
create maps of the same
location at different zoom
levels giving you a birds
eye view as well as a
close-up view showing
details such as street names
and other landmarks. |
|